How to Touch Up Paint Like a Pro
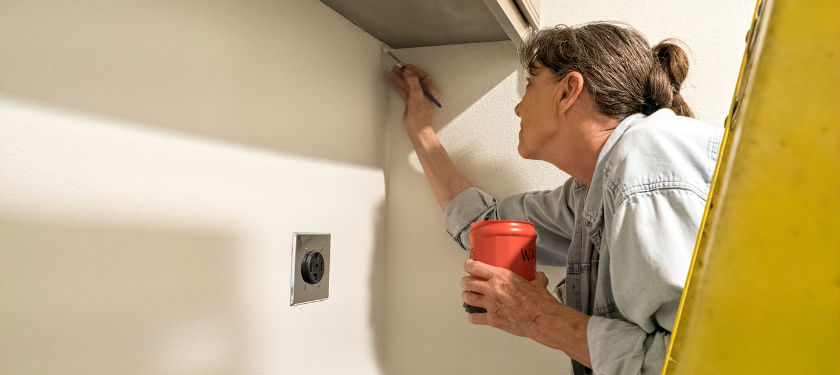
If you’ve ever noticed a scratch on your wall, chipped paint near your furniture, or wear and tear from daily life in your bathroom or basement, you’re not alone. Even high-end paint jobs aren’t immune to damage over time. That’s why learning how to touch up paint is an incredibly useful DIY skill. Whether it’s a tiny scuff, dent, or scratch caused by a tire brush-up, furniture move, or a curious child with a pen, this guide gives you all the tools and know-how to tackle it like a pro.

Step 1: Identify the Correct Paint and Sheen
Before you even lift a paintbrush, your first step is to understand exactly what kind of paint you’re working with. Every wall or ceiling surface has a unique combination of color, paint sheen, and brand. Was it flat, eggshell, semi-gloss, or gloss? These finishes reflect light differently and can dramatically affect how well your touch paint blends in.
If you no longer have the original paint can, try removing a small sample of drywall or wood—at least 1 inch wide—and bring it to a store for a digital color match. Also, try to match the manufacturing brand for the most accurate result, as different paint brands use unique pigment formulas and supply chain ingredients.
Step 2: Gather the Right Tools and Materials

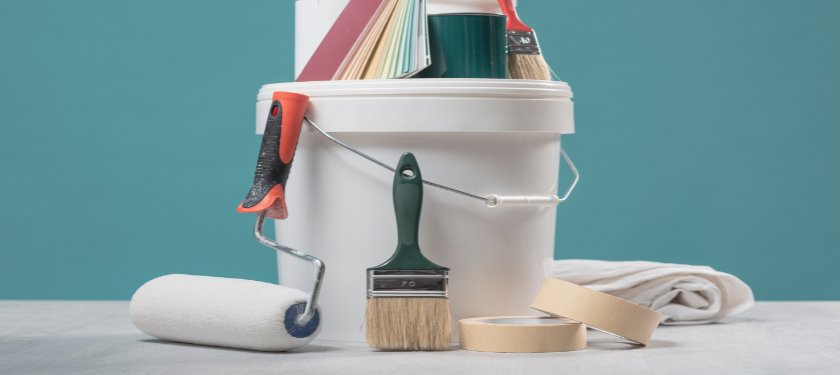
- Foam brushes, angled paintbrushes, or fine artist brushes for detail work
- Sandpaper (220-grit works well) or a sanding sponge to prepare rough or glossy areas
- Mild soap and warm water for cleaning the area
- Microfiber cloths, sponges, and cotton swabs for precision and blending
- Primer for bare wood, patched areas, or stains
- Painter’s tape to protect adjacent surfaces
- Towel or drop cloth to keep the work area clean
- Optional: Spray paint, acrylic paint, or scratch paint repair pens for special surfaces
Step 3: Clean and Prepare the Surface
Proper prep makes all the difference. Before applying any paint, start by thoroughly cleaning the area. Use mild soap, warm water, and a microfiber cloth to remove built-up dirt, dust, grease, or even plumbing residue that might be lingering on the surface.
Cleaning helps the paint adhere and ensures that you don’t seal in unwanted debris or rust. For areas with significant stains, especially around ceiling vents or in humid environments, consider using a degreasing cleaner or a diluted vinegar solution. Once clean, allow the area to dry completely before moving to the next step.
Step 4: Sand, Patch, and Prime
To make your touchup paint look seamless, you’ll want to smooth the surface and ensure it’s evenly textured. Use a fine-grit sandpaper to lightly scuff the edges of any chipped or peeling paint, then wipe away the debris with a dry towel.
If there are deep gouges, fill them in with a bit of clay, spackling compound, or lightweight drywall mud. Once dried, sand again to a smooth finish. Any exposed wood, drywall, or stained area should be coated with a quality primer to prevent flashing—a visual difference in sheen or color that occurs when paint is applied to untreated material.
Step 5: Apply Touchup Paint Carefully
Now it’s time to apply the touch paint. For most small repairs, a foam brush, angled brush, or cotton swab offers the control you need without overloading the surface. For smooth surfaces like glass, metal, or plastic, spray paint may offer better coverage—just mask off nearby areas with painter’s tape and work in light layers.
Apply the paint in thin coats. Thick applications can lead to streaks or raised patches that are hard to blend. Let each layer dry completely before deciding if more is needed. Use even pressure—too much will cause uneven spread or pooling, especially with gloss or lacquer finishes.
Step 6: Feather and Blend the Edges
The key to a professional-looking result is feathering. Start painting at the center of the damaged area and gently blend outward into the surrounding space using soft strokes or circular motions. This minimizes the chance of creating visible “paint islands” where the repair is obvious.
Try using a sponge or a soft-bristle paintbrush to dab the edges of the new coat, blending it into the existing color and texture. For higher sheens like semi-gloss, you might want to lightly dab with a dry towel or gently stipple with the tip of your brush.
Step 7: Let the Paint Cure and Inspect in Multiple Lights
Your last step is to let the paint fully cure. Most latex acrylic paint dries to the touch in a few hours, but full curing can take days. Avoid cleaning or scrubbing the area during this time. Give it 48–72 hours before wiping it down with water or soap.
Inspect the finished area under both natural daylight and artificial light. Subtle differences in paint sheen, texture, or color may appear depending on the time of day. If needed, apply one final blended coat to fine-tune your result.
Advanced Tips for Common Surfaces
Furniture & Cabinets
Touching up furniture and cabinets requires extra attention to detail. Because these pieces often feature smooth or factory-applied finishes, achieving a seamless look can be challenging without the right tool. For minor nicks and scratches, we recommend using a scratch paint repair pen or spray paint that matches the original color and gloss. These options allow for clean lines and minimal texture buildup.
Before applying any paint, thoroughly clean the surface to remove grease, dust, or dirt—especially in kitchen settings. Use a degreasing soap solution and allow the surface to dry. Lightly scuff with fine sandpaper, then apply a bonding primer to ensure your paint adheres smoothly to wood, plastic, or even metal cabinet hardware. Multiple light coats of acrylic paint or enamel will yield the most durable results.
Metal Trim or Fixtures
From basement vents to bathroom towel bars and metal plumbing fixtures, these surfaces often require specialized touch-up techniques. Start by removing any rust or loose paint with a wire brush or sanding block. For a long-lasting solution, apply a rust-inhibiting primer designed for metal surfaces.
Once primed, use lacquer, spray paint, or a high-quality aerosol product to match the existing sheen and color. Keep your pressure consistent and spray from a distance to avoid runs or oversaturation. For delicate detail work or tight corners, a fine-tipped paintbrush or cotton swab can help you reach precise areas without overspray.
Bathroom & Kitchen Walls
These high-moisture environments are especially prone to wear and tear, making regular touch-ups more likely. Steam, splashes, and condensation can cause paint to peel, bubble, or discolor over time. Start by cleaning the affected area thoroughly with soap and water, then let it dry completely. Check for underlying issues like mold or plumbing leaks and repair them before proceeding.
Use a mildew-resistant primer for maximum protection, especially on ceilings or above showers and sinks. When selecting your paint, opt for a semi-gloss or satin finish, which provides better water resistance and is easier to clean. Apply thin, even coats, and allow each layer to dry thoroughly before reapplying.
High-Traffic Areas
Entryways, hallways, staircases, and around door frames are particularly vulnerable to scuffs, scratches, and general damage. These walls often require more frequent touch-ups due to contact with bags, furniture, or even pets. For best results, use a durable, washable paint like semi-gloss or high-sheen acrylic paint, which can withstand repeated cleaning without degrading the finish.
Before touching up, remove built-up grime using a microfiber cloth and gentle soap. For deeper gouges or dents, apply a quick-drying filler or clay-based patch, then sand it smooth. A foam applicator or angled brush works best in corners and edges where control is critical. To maintain a cohesive appearance, feather the touch paint outward into the existing surface.
Ready for a Flawless Finish? Trust Speese Painting for Expert Results in Michigan
Need a larger area painted or want a guaranteed flawless finish? Contact Speese Painting today for expert-level service, professional materials, and customer care that stands out. We’re proud to serve Michigan homes and businesses with quality you can trust.
FAQs – How to Touch Up Paint Like a Pro
Start by cleaning the area, then sand it lightly, apply a matching primer if needed, and use small amounts of touchup paint with a foam brush, sponge, or cotton swab. Feather the edges for a seamless finish.
Match the paint sheen, apply light coats, and blend using a dry towel or sponge. Let the area fully cure before evaluating under different light conditions.
Yes, especially for surfaces like plastic, metal, or furniture. Use aerosol products sparingly and mask surrounding areas to avoid overspray.
A scratch fix all in 1 pen or color-matched spray paint works well. Always sand lightly and apply a primer base if the surface is exposed.
What Homeowners & Business Are Saying About Us Reviews and Testimonials


